Hardware
Learning Arduino
Starting with an Arduino Uno, I began exploring embedded systems through my first build, upload, blinking LED, RGB LED, and PWM—and started to understand how code can act on the physical world.
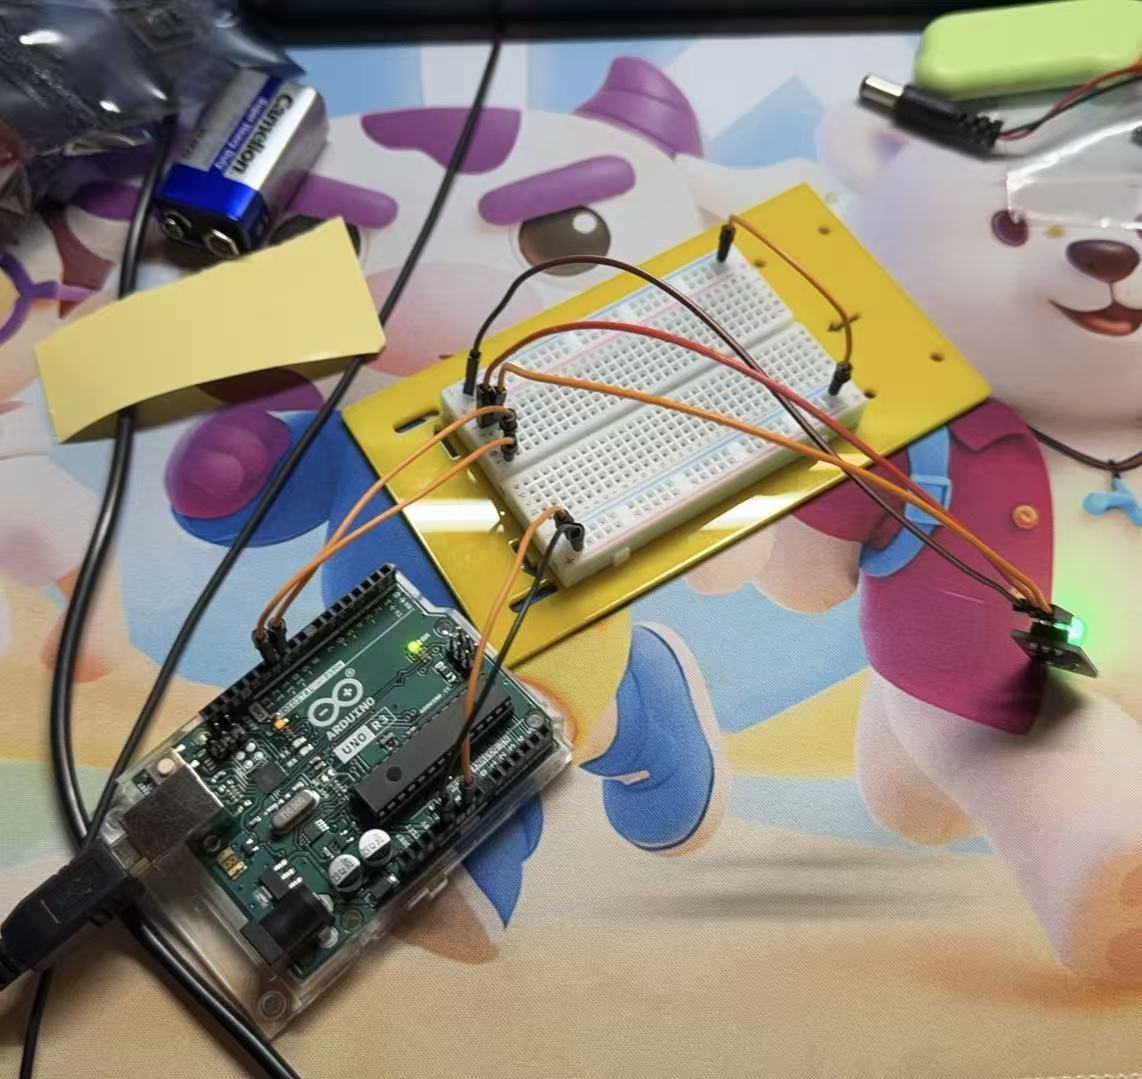
I recently started learning Arduino seriously.
I had already written some C++ before, but this was the first time programming made me feel that code was directly connected to the physical world.
Most of the programs I had written before ended on a screen. Variables changed, programs printed results, and algorithms finished their calculations.
This time was different.
I clicked Upload, sent a program into an Arduino Uno, and watched an LED begin blinking exactly as I had instructed it to.
It was a very small thing.
But it felt strangely significant.
A line of code had become an electrical signal.
Why Arduino?
My real goal is not simply to “learn Arduino.”
What interests me much more is the complete chain behind systems like this:
Sensors
   ↓
Microcontroller
   ↓
Data Processing
   ↓
Communication
   ↓
Server
   ↓
AI
   ↓
Feedback
Eventually, I want to understand how to build this entire chain myself.
Arduino is simply one of the earliest steps.
From here, I want to continue toward ESP32, sensors, millimeter-wave radar, wireless communication, edge computing, servers, and AI.
Further ahead, I hope to connect these technologies with the fields I am studying and care about most:
Biomedical Engineering
Brain-Computer Interfaces
Neurofeedback
Wearable Systems
Closed-Loop Systems
So for me, Arduino is not really the destination.
It is an entrance into the physical side of computing.
My First Development Board
I am currently using an Arduino Uno.
At the center of the board is the:
ATmega328P
Some of its basic specifications are:
Clock speed: 16 MHz
SRAM:        2 KB
Flash:       about 32 KB
The first number that really surprised me was:
2 KB SRAM
Modern computers casually come with tens of gigabytes of memory.
Yet this tiny microcontroller has only a few kilobytes of RAM and can still control hardware, read sensors, communicate with other devices, and run real-time logic.
That immediately made embedded programming feel very different from normal desktop programming.
On a computer, wasting a few megabytes may barely matter.
On a microcontroller, memory, pins, timing, and hardware resources suddenly become concrete.
My Development Environment
Instead of using the traditional Arduino IDE, I decided to use:
Arduino Uno
+
VS Code
+
PlatformIO
+
C++
A basic PlatformIO project looks something like this:
project/
├── include/
├── lib/
├── src/
│   └── main.cpp
└── platformio.ini
Most of the program itself lives in:
src/main.cpp
while platformio.ini describes the target environment.
For example:
[env:uno]
platform = atmelavr
board = uno
framework = arduino
At first, configuration files like this were things I would simply copy without thinking too much about them.
Now I am beginning to understand what they actually mean.
platform = atmelavr
selects the AVR hardware platform.
board = uno
tells PlatformIO that the target board is an Arduino Uno.
And:
framework = arduino
selects the Arduino Framework.
PlatformIO then knows which compiler, libraries, board definitions, and upload tools it needs.
A process that once felt like “pressing a button” is slowly becoming less mysterious.
Build and Upload
One of the first things I had to understand was the difference between:
Build
and:
Upload
At first, both seemed to mean roughly the same thing:
Make the program run.
But they are actually two very different stages.
Build
The build process roughly looks like this:
C / C++ Source Code
        ↓
     Compilation
        ↓
       Linking
        ↓
Executable Program
for the Microcontroller
For example, I may write:
digitalWrite(LED_BUILTIN, HIGH);
The ATmega328P does not understand C++ directly.
C++ is written for humans.
The source code must eventually be translated into machine instructions that the processor can actually execute.
So Build answers the question:
How does human-readable source code become a program the machine can execute?
Upload
Upload happens afterward:
Compiled Program
      ↓
     USB
      ↓
 Arduino Uno
      ↓
Flash Memory
So I now think of the two steps like this:
Build creates the machine-executable program.
Upload places that program onto the board.
Previously, they were just two buttons.
Now they represent two different stages in the journey from source code to running hardware.
My First Blinking LED
The classic Arduino program is, of course, Blink.
#include <Arduino.h>

void setup() {
    pinMode(LED_BUILTIN, OUTPUT);
}

void loop() {
    digitalWrite(LED_BUILTIN, HIGH);
    delay(1000);

    digitalWrite(LED_BUILTIN, LOW);
    delay(1000);
}
Its behavior is simple:
ON for 1 second
       ↓
OFF for 1 second
       ↓
ON for 1 second
       ↓
OFF for 1 second
       ↓
...
But what interested me most was not the fact that the LED blinked.
The more interesting question was:
Why can this line of code physically turn on an LED?
For example:
digitalWrite(LED_BUILTIN, HIGH);
At the surface, this is only a function call.
But underneath it lies an entire chain:
C++ Code
   ↓
Arduino Framework
   ↓
Machine Instructions
   ↓
Microcontroller Registers
   ↓
GPIO Hardware
   ↓
Pin Voltage Changes
   ↓
LED Emits Light
An abstract software instruction ultimately changes the physical electrical state of a pin.
Current flows through the circuit.
The LED emits light.
That was probably the first moment when software and hardware felt truly connected to me.
setup() and loop()
Two functions appear everywhere in Arduino programs:
void setup()
and:
void loop()
setup() normally runs once when the board starts.
It is used for initialization, for example:
pinMode(LED_BUILTIN, OUTPUT);
This tells the microcontroller that the pin will be used as an output.
loop(), meanwhile, runs repeatedly.
A simplified mental model is:
setup();

while (true) {
    loop();
}
So the basic structure becomes:
Power On
   ↓
Initialize Once
   ↓
Run loop()
   ↓
Run loop()
   ↓
Run loop()
   ↓
...
It is simple, but it already introduces the basic idea of a continuously running embedded system.
From a Normal LED to an RGB LED
After working with a normal LED, I moved on to an RGB LED.
RGB stands for:
Red
Green
Blue
An RGB LED can be thought of as several light-emitting elements placed inside a single package.
By controlling the intensity of the three channels independently, different colors can be produced.
For example:
R = 255
G = 0
B = 0
produces red.
While:
R = 255
G = 255
B = 0
can produce yellow.
That led to a new question:
If a digital pin can only be HIGH or LOW, how can it control brightness?
This is where I encountered PWM.
Understanding PWM for the First Time
PWM stands for:
Pulse Width Modulation
For example:
analogWrite(pin, 128);
At first, I naturally assumed this meant the Arduino was outputting some stable voltage halfway between 0 V and 5 V.
It does not.
On the Arduino Uno, analogWrite() usually still produces a digital signal that rapidly switches between:
HIGH
LOW
HIGH
LOW
HIGH
LOW
...
What changes is not the voltage level itself.
What changes is:
how long the signal remains HIGH during each cycle.
Duty Cycle
Suppose a signal is HIGH for half of every cycle:
HIGH: 50%
LOW:  50%
Its duty cycle is:
50%
If it is instead:
HIGH: 75%
LOW:  25%
the duty cycle becomes:
75%
On the Arduino Uno, analogWrite() commonly takes a value from:
0 to 255
which can roughly be understood as:
255 → nearly 100% HIGH
192 → about 75% HIGH
128 → about 50% HIGH
64  → about 25% HIGH
0   → always LOW
So:
analogWrite(pin, 255);
makes an LED appear very bright.
While:
analogWrite(pin, 64);
makes it appear much dimmer.
But the LED Is Still Blinking
This is the part I find especially interesting.
At the electrical level, the LED is still rapidly switching:
ON
OFF
ON
OFF
ON
OFF
...
The switching simply happens too quickly for the human eye to resolve each individual pulse.
Instead of perceiving:
flash → flash → flash → flash
we perceive:
a different brightness
That gave me a much more intuitive understanding of an important idea:
A digital system built entirely around discrete states can use time to create behavior that appears continuous.
I find that idea surprisingly elegant.
RGB Fading
Once PWM is available, the color channels can also change gradually.
For example:
for (int i = 0; i <= 255; i++) {
    analogWrite(RED_PIN, i);
    analogWrite(GREEN_PIN, 255 - i);

    delay(10);
}
Here, the red channel increases:
0 → 255
while the green channel decreases:
255 → 0
Mathematically:
R = i
G = 255 - i
which means:
R + G = 255
On a normal computer program, i and 255 - i might simply be two numbers.
On the Arduino, they become part of a physical chain:
Mathematical Relationship
          ↓
        Program
          ↓
         PWM
          ↓
    Electrical Signal
          ↓
         LED
          ↓
    Visible Color Change
A changing number becomes something I can actually see.
digitalWrite() and analogWrite()
At this point, the difference between two commonly used functions started to become clearer.
digitalWrite()
digitalWrite(pin, HIGH);
digitalWrite(pin, LOW);
controls a digital output state.
Conceptually:
ON / OFF
1  / 0
HIGH / LOW
analogWrite()
Despite its name, analogWrite() on an Arduino Uno does not normally create a true analog voltage.
Instead, it uses PWM.
That allows the output to produce effects such as:
bright
slightly dimmer
dim
very dim
off
through changes in duty cycle.
This distinction is simple once understood, but initially the word analog made the behavior much less obvious to me.
Why Arduino Is More Interesting Than I Expected
Before actually using Arduino, I sometimes thought it might be “too simple.”
After all, many basic programs consist of functions like:
pinMode()
digitalWrite()
analogWrite()
delay()
But now I think that simplicity is one of Arduino's greatest strengths.
It hides some complexity without hiding the existence of the real hardware underneath.
At the surface:
digitalWrite()
looks simple.
But beneath it are layers such as:
C++
 ↓
Arduino Framework
 ↓
AVR
 ↓
Registers
 ↓
GPIO
 ↓
Circuit
As a beginner, I can start at the top.
Later, I can gradually move downward into:
Registers
Interrupts
Timers
ADC
UART
I²C
SPI
PWM
Memory
Real-Time Systems
This means Arduino can become more than a way to make LEDs blink.
It can become a bridge connecting programming, computer architecture, electronics, signals, and embedded systems.
From Code to the Physical World
So far, the most important thing I have learned from Arduino is not a particular API.
It is this chain:
Program
   ↓
Machine Instructions
   ↓
Processor
   ↓
Registers
   ↓
GPIO
   ↓
Voltage / Current
   ↓
Physical World
Programming used to feel more abstract.
Now I can change a variable.
That variable changes a PWM signal.
The PWM signal changes the behavior of a pin.
The pin changes the LED.
And I can see the result with my own eyes.
Several areas of knowledge that once felt disconnected are beginning to fit together.
What Comes Next
This is still only the beginning.
There is a lot more I want to learn:
GPIO
Digital Input and Output
PWM
ADC
Serial Communication
Buttons
Sensors
I²C
SPI
From there, I plan to gradually move from Arduino Uno toward ESP32.
The path I currently imagine looks something like this:
Arduino Uno
     ↓
ESP32
     ↓
Sensors
     ↓
Millimeter-Wave Radar
     ↓
Wi-Fi / BLE
     ↓
Server
     ↓
Edge Computing
     ↓
AI
And beyond that, I want to connect these systems with my longer-term interests:
Biomedical Engineering
        ↓
Biosignals
        ↓
Brain-Computer Interfaces
        ↓
Neurofeedback
        ↓
Real-Time Closed-Loop Systems
Ultimately, I am not trying to build a blinking LED.
What I want to understand is how to build a complete loop:
Sense
  ↓
Compute
  ↓
Understand
  ↓
Decide
  ↓
Act
  ↓
Feedback
Arduino is not the destination.
It is simply the first stop on my journey into hardware, embedded systems, and computers that interact with the real world.
And perhaps, years from now, if I ever look back at much more complicated systems I have built—
it will still be possible to trace everything back to the first time I made an LED light up with my own code.